Wednesday, December 15, 2010

The Read Abouts: December

Christmas

Read: How The Grinch Stole Christmas by Dr. Seuss

Craft: Book Angels or Book Elves
  • Need: Old paperback books, glue, glitter, small round object for head (I used Sculpty clay and made my own), popsicle sticks, pipe cleaners, yarn and fabric.
I began by folding the pages as if dog-earing them -- folded into the spine. (I did this in advance because of time limitations). When pages are completely folded, carefully tear the cover off the book. I then hot-glued my Sculpty clay heads onto popsicle sticks. Then I hot-glued the pop-stick between two pages in the middle of the book. I also drew the face on each head and made yarn hair as well as made all the clothes .... Geez, so I basically made all the elements of the this craft!!!! Then I allowed the children to glue it all together -- hehe. Hey, our after school storytime is only a half-hour and the kids are a "bit" wiggly ... so the more done the better (better for all of us, believe me). So, they basically glued a bunch of stuff on. But, look at the finished product. I LOVE THEM!!
This one is mine!!
Pretty angel
Finished product

Tuesday, December 14, 2010

Burnham Bunch: Santa Claus

Christmas Part II

Read: 10 Trim-the-Tree'ers by Janet Schulman and Where, Oh Where is Santa Claus? by Lisa Wheeler

Storyboard: Read 10 Trim-the-Tree'ers and at the prompts, have children place items onto storyboard felt tree.

Craft: Candy Cane
  • Need: Sticky-back paper. Ripped bits of red and white tissue paper. Glitter.
  • Prior to storytime, trace candy cane shape onto non-sticky side of sticky-back paper and then into rectangles.
  • At each seat, tape sticky-back paper (with backing removed) onto the table -- sticky side up.
  • Instruct children to sprinkle a bit of glitter and then stick red and white tissue onto the candy cane, trying to remain in the lines of the shape.
  • Have each child raise their hand when completed. Apply a sheet of white copy paper on top of sticky-back paper. Cut into the candy cane shape.

Tuesday, December 7, 2010

Burnham Bunch: Snowman

Snowman

Read: There Was a Cold Lady That Swallowed Some Snow by Lucille Colandro and The Snowman Storybook with words by Raymond Briggs

Storyboard: As the story progresses prompt children to put story pieces on our Old Lady's apron.

Craft: Snowman
  • Need: Craft paper in blue and orange, string, fabric scraps, sticker eyes, white poster paint and regular-size marshmallows.
  • Prior to storytime, trace and cut snowmen from blue craft paper and carrot noses from orange paper. Trim string for the snowman's smile and trim fabric for scarf. Write child's name on each snowman.
  • Set up each craft seat with snowman, marshmallow and a plate with a small amount of white paint.
  • Instruct children to flip over snowman, so their name is on the backside and then paint snowman using the marshmallow as a stamp.
  • When finished painting. Have children adhere (using glue or a bit of the paint) the nose, eyes, and scarf.
Well, we did have a bit of snow before today's craft....Well, at least some of us did! I had 2 inches at my house. But when I drove into work, there was not a flake to be seen! But it is COLD! So, I think the children will get the idea?

Hey, Mr. Snowman!

Wednesday, December 1, 2010

Burnham Bunch: Christmas Macaroni Ornaments

Christmas Part 1

Read: The Mitten by Jan Brett and Llama Llama Holiday Drama by Anna Dewdney

Story extender: As story is read, prompt children to add their animal to the "mitten"

Craft: Macaroni Ornaments

I love this easy craft. Each year, I try to change it up a bit....This year I am using popsicle sticks!! (Oh, I know....I am such a craft genius)
  • Need: Assorted macaroni of your choice, white glue, popsicle sticks and silver spray paint.
  • At each craft seat, place a paper plate with child's name and three pop-sticks.
  • Place assorted macs in the middle of the table for children to share.
  • Instruct children to glue together pop-sticks in a snowflake shape.
  • Rule for this craft: The MORE glue the better!!!
  • When sticks are glued, ask children to choose five macs to decorate their snowflake. Then instruct them to glue macs to pop-sticks.
  • When all children have completed their project. Explain that this is just the first step to their completed project and that you are going to help them finish.
  • Spray each ornament with silver paint. Hot glue a string to the back.
The moms loved this craft....I can't wait to see the finished painted projected! And the children love that you couldn't use enough glue! They don't hear that very often ....
Step One: Make a snowflake shape

Step Two: Glue it to death with macaroni
The finished product


Wednesday, November 17, 2010

The Read Abouts: November

Thanksgiving

Read: Thanksgiving Rules by Laurie Friedman and The Night Before Thanksgiving by Natasha Wing

Craft: Turkey Place Markers (from FamilyFun.com)

Need: Way to many things for me to write...So, check out the Family Fun link above....

This is a really cute and easy craft. If you make them at home, you can create one for each family member attending Thanksgiving dinner. We are going to have each child make one....with a Happy Thanksgiving clipped in the clothes pin.


Burnham Bunch: Thanksgiving Turkeys

Thanksgiving
Read: What is Thanksgiving by Harriet Ziefert and Gobble Gobble Crash by Julie Stiegemeyer
Craft: Playdough Turkeys (Just Deanna)

  • Need playdough (recipe here), feathers, beaks, eyes and orange pipe-cleaner feet
  • Prior to storytime make the above playdough recipe....Just love storytime "homework"
  • Give each child a wad of playdough on a paper plate. (helps for transporting it home)
  • Instruct them to roll it into a ball and then
  • Then stick in the feathers and feet, apply eyes and beak. Easy-peasy


Wednesday, November 10, 2010

Burnham Bunch: Thanksgiving Noodle Necklaces

Pilgrims/Friendship

Read: The Little Pilgrim by Brandi Dougherty

Storyboard: Turkey Wore a (Color) Feather
Tune: Mary Wore a Red Dress
Turkey wore a red feather, red feather, red feather.
Turkey wore a red feather all day long.
....continue calling out various colors having children place their feather on board as their color is called.
....last verse
Turkey wore rainbow feathers, rainbow feathers, rainbow feathers.
Turkey wore rainbow feathers all night long.
Craft: "Native American" Noodle Necklaces
  • Need: Dyed macaroni -- in various colors, pipe cleaners or string.
  • Prior to storytime dye the macaroni. This is really simple: mix food coloring and isopropyl alcohol in a Ziplock bag (enough to cover the mac). Add mac and let sit until you get the desired hue. Lay mac in a single layer on a paper towel-covered cookie sheet. Not going to lie to you....the smell is HARSH! Let dry overnight.
  • At storytime, set each child's place with cup or plate (we used recycled fruit cups), 12-15 macaroni, and pipe cleaner or string.
  • *Hint* You may need to combine two pipe cleaners for necklace length. And threading is a ton easier for wee ones when using pipe cleaners. Also, "j" the ends, so the noodles don't fall off when they are thread
  • Instruct them on how to thread their mac onto the pipe cleaner or string. Afix the two ends together and slip over their heads. Super cute and EASY!  
Our "beads"
 
Beautiful Necklace


Wednesday, November 3, 2010

Burnham Bunch: Squirrels

Squirrels

Read: The Busy Little Squirrel by Nancy Tafuri

Craft: Acorn painting (No Time for Flash Cards/Mom Tried It)
  • Need acorns, paint - orange, yellow, brown, acorn stencil.
  • Like marble painting and apple printing. Children can experiment with acorns by rolling and using top for stamping. (Thanks for the acorns, mom!!)
blog 258
No Time for Flash Cards


Wednesday, October 27, 2010

The Read Abouts: October

Halloween (of course!)

Read: Who Will I Be? A Halloween Rebus Story by Shirley Neitzel

Craft: Halloween Jar Luminaries

I have done this craft loads of times. Very easy, fun and a great decoration! You can make a ghost or a bat, Frankenstein, Dracula.....the options are endless. I usually adapt it for my Preschool set -- for example, we only make ghosts and everything is cut out and ready for them to glue/decoupage. For this crowd, I am going to let them do all the work!!! Yay!
  • Need: Glass jars, tissue paper in various colors, white glue, foam brushes, and scissors.
  • Lay out all the tissue paper on the craft table. And have them decide on their design.
  • Explain and show them the decoupage technique. Glue the tissue paper, base color etc, less is more.....
  • For a ghost: tear or cut strips of white tissue paper, decoupage the strips all over the outside of the jar, cut out eyes and mouth from black tissue paper and adhere on top of the white.
  • Give each child some votive candles -- because you know they are going to want to see the result as soon as they get home!


Here are some of our finished products:


OK, can you tell which one I was asked to help with? He wanted a skeleton and instructed me on how the skeleton should be drawn!!! No abstract idea of a skeleton, he wanted the literal translation. I showed them a bunch of diagrams of how to make a Ghost, Vampire, Monster....and then the girls asked for pink tissue paper.....the rest is history...

Burnham Bunch: Halloween Party

Halloween Week 2

Read: The Spooky Wheels on the Bus by J. Elizabeth Mills and Ten Timid Ghost by Jennifer O'Connell.

Storyboard: Using Spooky Wheels have children stick story-pieces on the board as the book progress

No craft: Halloween Party! Woo Hoo! Lots of treats.....and no tricks!!


The ever popular train table....

All I wanted to do was squeeze his little Monkey belly...

I was told "I'm a construction worker" about 10 times.
Well, the hat, tool belt, shorts and workboots did not give you away! heheh
Queen Cecilia and Saint Isabel (yes, really!!)

The whole Thursday gang

Little bit of Halloween music = preschool dance par-tay...


How cute is this.....


Wednesday, October 20, 2010

Burnham Bunch: Ghosts

Halloween Week 1 : Ghosts

Read: There was an Old Lady Who Swallowed a Bat by Lucille Colandro

Storyboard: Using the above book, have children place story-pieces on our Old Lady's apron as the book progresses.

Thursday Craft: Milk jug ghosts
  • Hopefully I will collect enough milk jugs (with caps!!!), white paint, black craft paper, and glue dots.
  • Prior to storytime, cut black craft paper into eyes and mouth shapes and adhere glue dots. Paint the caps white using acrylic paint -- and let dry. Oh, and by the way getting the labels off is tricky! But, with much patience and a little bit of hot water -- you are good to go!
  • Squeeze some paint into the jug, before setting on craft table.
  • Instruct children to shake their milk jugs until the entire inside is painted white.
  • When they are satisfied with the result. Stick-on eyes and mouth shape.


Wednesday Craft: Sticky Paper Ghosts (No Time for Flash Cards)

Well, I didn't collect enough milk jugs. So, I had to improvise. I saw this simple and easy ghost project on my NTFFC. We have a few wee ones for our Wednesday session, so I thought I would save the milk jugs for Thursday.
  • Need sticky-back paper, black craft paper, white tissue paper and sticker eyes.
  • Prior to storytime, cut sticky-back paper into 8 inch wide pieces. Draw ghosts onto squares of black paper, cut out the inside, which will leave you with a "frame" Adhere the frame to the sticky-back paper and layout for children. (I used the inside to cut the eyes and mouths for the Wednesday ghosts)
  • Instruct children to cover their entire inside of the ghost frame with tissue paper.
  • When they are finished, flip over and have them adhere the sticker eyes.
  • Trim around the frame for the finished product.
  • Thank you again No Time for Flash Cards! (Ummm, Have I mentioned how much I LOVE you?)


Spooky Ghost -- Ohhhh!

Our "Old Lady" Story board


Wednesday, October 13, 2010

Burnham Bunch: Pumpkins

Pumpkins

Read: Pumply Dumply Pumpkin by May Serfozo and Duck and Goose Find a Pumpkin by Tad Hills

Storyboard: Field of Pumpkins poem
Five little pumpkins
Let's go explore
I picked one
And that left four
(and etc ..... counting down from five to zero)
Craft: Jack-o-lantern Stencil Painting (No Time for Flashcards)
  • Need: Foam paint rollers (yay, we are finally utilizing these awesome rollers I bought from Discount School Supples), orange craft paper, black paint and jack-o-lantern stencils.
  • Prior to storytime, cut out two pumpkin stencil per child.
  • Lay out orange paper with stencil on top. Let them "have at it" and paint the entire paper....
  • Carefully peel stencil off ... and Voila!
 
No Time for Flash Cards

The children loved this...loved the rollers..loved the result...LOVE LOVE LOVED!

Wednesday, October 6, 2010

Burnham Bunch: Owls

Owls

Read: Little Lost Owl by Chris Haughton and Wow! Said the Owl by Tim Hopgood.

Story extender/ Story board: Using Wow! Said the Owl display color-appropriate story-pieces as the story progress. Give children the chance to "shout" the color that coordinates with the text.

Craft: Owls
  • Need: Construction paper owl-parts cut from various colors. Glue sticks.
  • Prior to storytime, have your wonderful assistant cut many many many owl-parts shapes out of paper (thanks, Susan!). For example, we had blue circles, purple half-circles, yellow rectangles, "sunny-side-up" eggs shapes, and orange and pink triangles. (see finished product below)
  • Children will then paste together their an owl using all the colored owl-parts.
  • As we constructed our owls, I prompted the children to find their blue circles and glue them to their owl body, find the pink triangles and glue and etc.


Shape and color owl -- Whoo Whoo!


Oh, my friend Shelley is going to LOVE this craft. She is a super-big fan of owls, as is my cousin Michelle. I bought them both the above book Little Lost Owl, because it is my FAV! book of the season. Love the illustrations and the simple story. When reading aloud you can totally expand on the story and interact with the children. And, it gives you a great chance to use your story-voices.

Wednesday, September 29, 2010

The Read Abouts: September

The Read Abouts

Kindergarten and First Grade Story-sharing.

We tried Kindergarten Storytime last year ... with no success. But, if at first you don't succeed ..... I changed-it-up by included first grade and describing it as story sharing and....... we had eight children at our first meeting! Wahoo! (yes, eight is a large number for us) They had a great time and really enjoyed the "art" aspect of our activity. I may try to make the activity more arty than crafty, hmmmm? We will see.......

Fall/Autumn/Leaves

Read: Fletcher and the Falling Leaves by Julia Rawlinson

Song: It is Autumn (To the tune of If You're Happy and You Know It)
It is Autumn and it is time to rake the leaves.
It is Autumn that's the season,
We don't need another reason.
It is Autumn and it's time to rake the leaves.
(at the end of the song, surprise children by tossing leaves out into the crowd)

Craft: Coffee filter leaves.
  • Need: Leaf templates, coffee filters, yellow, orange and red watercolor paint, droppers.
  • Prior to storytime, cut out various coffee filter leaves. Lay out paper towels on top for mess-control and paper plates to transfer leaves home.
  • Instruct children on how to use the dropper and paint leaves. As they finish each leaf, have them place onto paper plate.
  • Give them ideas on how to display when dry: lay around pumpkin, thread to make a mobile, tape to window....etc. 
Coffee Filter Leaves


Burnham Bunch: Apples

Apples

Read: Ten Red Apples by Pat Hutchins and The Apple Tree by Lynley Dodd

Story board/extender: Felt tree and apples numbered 1-10. Using Ten Red Apples by Dodd, count down from 10 to zero with the farmer.

Craft: Apple Printing
  • Need: Apples cut in half, poster paint (green, red, yellow) and craft paper, foam paint brush (less messy if children paint apples rather than dipping apples in paint). Brown and green markers.
  • Have children paint apple (use one color per apple, unless you want brown apples!)
  • Instruct them how to stamp apple onto paper.
  • Wipe apple with paper towel and have them paint it another color. Stamp again. Wipe, paint and stamp again.
  • While children are enjoying free play (i.e. all ten children fighting over the train table), draw on a brown stems and green leaves. Easy-Peasy.


Wednesday, September 22, 2010

Burnham Bunch: Fall Leaves

Fall/Autumn/Leaves

Read: Footballs and Falling Leaves by Rebecca Fjelland Davis, The Autumn Leaf by Carl Emerson and Mouse's First Fall by Lauren Thompson

Story extender/ Story board: Using Footballs and Falling Leaves as prompt I or children add a story-piece as the book progresses.

Craft: Sticky-back paper leaves
  • Need: Sticky-back paper, tissue paper (red, yellow, brown, orange). Leaf template.
  • Prior to storytime, I cut tissue paper into pieces and separate into baskets by color. Tape sticky-back paper to leaf template and then tape to the craft table.
  • Have children choose colors and adhere them to the magic sticky paper. Instruct them to raise their hand when finished to be dismissed from the table for free play.
  • While they are playing, fold the other half of sticky-back over the tissue-crafted side and then cut around template.

Wednesday, September 15, 2010

Burnham Bunch: Trucks

Trucks

Read: Trucks, Roll! by George Ella Lyon and The Three Little Riggs by David Gordon

Craft: Cut 'n Paste Shape Truck (No Time for Flash Cards)
  • Need: Construction paper cut into squares, rectangles, half-circle shapes (red, blue, yellow orange), black paper into circles (tires) and brown paper ripped into bits. Crayons..
  • Instruct the children to design a truck using the various shapes.... I could not believe how well they did.
Check this one out!!! Really he did it without any help.....Can't you just feel his concentration! After he was done he said that he forgot to put on a flashing light....

Wednesday, September 8, 2010

Burnham Bunch: Welcome Back

Welcome Back

Read: Lola at the Library and Lola Loves a Story by Anna McQuinn

Discuss libraries, behavior in the library, reiterate elevator procedures....

Song: Our "Theme" Song

Craft: Create a storytime journal
  • Need scrapbooking paper (from Target $1 bin, too excited for words),  hole-punch, ads, lined paper (made mine), title page with place for child's name, crayons, and stickers.
  • Prior to storytime, fold and construct a booklet for children to decorate. Send home with children as a storytime "extender."

A lot of my mother's are teachers...I think they will really get into this idea of a storytime extender. I used brads, so they can add their own pages, pictures etc.....

Thursday, September 2, 2010

Our "Theme" Song

Welcome Everyone!

We started singing this song two years ago and what a HIT! Believe me, if I forget to sing it one week....they will never let me forget again! I usually let the children settle-in and play with the toys (i.e. The Train Table), and interact with their storytime friends. When I am ready to begin storytime, I instruct them all to get their story carpets (carpet remnants) and be seated. After the children settle down, we begin by singing:

(In the tune of Twinkle, Twinkle Little Star)

Welcome, welcome everyone
Now you're here let's have some fun
We will work and we will play
We'll have fun in many ways
Here is what we're going to do
Listen and you'll have fun too

               -- Jean Warren at Preschool Express

If we have a newbie or visitor, who may not be aware of the lyrics, it is easy for them to hum the tune along with us (because EVERYONE knows the tune to Twinkle, Twinkle Little Star!!! - right?).
Then, after we finish singing, I introduce our story theme for the week. We may have a little bit of discussion and begin our story.....

Saturday, May 8, 2010

May Ideas

Ducks -- Duckling Month
Read: Dawdle Duckling by Tony Buzzeo and Dimity Duck by Jane Yolen
Craft: Duck Collage
  • Need duck shape cut out of white paper, white tissue paper pieces, orange paper cut into beaks and feet...and an eye (of course)
  • Prior to storytime cut out all the necessary pieces.
  • Have children glue the white tissue pieces onto duck to create feathers....then glue on the beak/bill and the eyes and feet.
Actually, my cousin Michelle (an art teacher) told me that collage is a great craft for little ones. I have repeated this medium throughout the year. It takes little prep time and you can adjust it for just about any theme.

Bugs
Read: I Love Bugs by Dodd and The Very Greedy Bee by Smallman
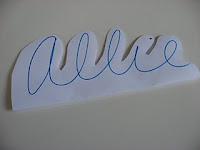
Craft: Cursive Name Bugs (OMG! I LOVE this idea from No Time for Flash Cards)
  • Need craft paper, marker, eyes!, crayons
  • Prior to storytime, fold a piece of craft paper in half. Write in cursive each child's name on one half of the craft paper. With the paper folded, trim around the name on the outside edge of paper. Open it up, and you have an awesome "bug" shape.
Before we began our craft, I talked about different types of writing ... printing which they are used to seeing and cursive which is a little bit fancy. On our chalkboard, I showed them my name printed and then in cursive. Then I asked them to try to find their name at the table and take a seat.

Check out these images from No Time for Flash Cards (did I mention that this is my most favoritest blog?)


Dogs
Read: Lyle Walks the Dogs: A Counting Book by Bernard Waber
Craft and story extender adapted from Preschool Daze
Story extender: While reading prompt the children to count the dogs on each instance. After the story, we made a list of Dog Needs on the white board i.e. food, toys, play with them and etc.....
Craft: Dog Puppet
  • Need paper lunch bags, brown, black and white craft paper paper cut into circles (eyes, noses and spots), triangles and other ear shapes, and red craft paper for tongues.
  • Have your co-worker (heheheh) cut zillions of shapes out of the various craft papers.
  • Let the children pick and choose the shapes they would like to make a complete doggy puppet.
Preschool Daze
Vacation
Read: Counting our Way to Maine by Maggie Smith and something else I can't remember???

I actually don't remember what we did!!!!! I was so very busy preparing for summer reading, I don't know if we did a craft or not! Oh, old age .... you devil!

Thursday, April 8, 2010

April Ideas

Let's Celebrate Frog Month
Read: Jump! by Fischer and A Frog in a Bog by Karma Wilson
Craft: Frog Face
  • Need green paint, sponge brushes, red craft paper, large paper plates, clip-art flies and eyes.
  • Prior to storytime, print out fly clip-art and large eyes and cut red paper into strips and curl one end (to look like long tongue)
  • Give children a limited amount of green paint and have them paint the plate. (In order to hurry along the drying process, blot excess paint with paper towel)
  • Next, glue on two big eyes, tongue and lastly the fly.

Our storytime is structured for 2 to 5 year-olds, but younger siblings can attend as well. If we have extra craft supplies, we invite the parents and younger sibling to join us. Because of having so many "little ones," we use paper eyes. My co-worker cuts about a million eyes a year, for use in our various crafts. I use Microsoft Publisher and design a sheet of eyes -- adjusting the size and shape for what is needed .... and it is a heck of a lot cheaper than purchasing googly eyes!

Earth Day
Read: My Garden by Henkes and Up, Down and Around by Katherine Ayres
Craft: Planting seeds
  • Need soil, various flower seeds, and cups.
  • Prior to storytime, I put a few of each type of seed into ketchup cups (if you haven't noticed yet, these are invaluable. You can purchase an entire box of these little paper cups at the party supply store.)
  • I prepared three "stations" around the craft tables. Two stations were for scooping dirt - (large mixing bowls with potting soil and cups for scooping) and the third station was set up with the seeds.
  • The group split into two groups, scooped dirt into their cups and moved along to the seed section. I showed them how to put a small impression into the dirt with their fingers and then plant the seeds.
Great and simple project for when you are more than done with cutting out vast quantities of eyes and other bits for gluing-crafts!!! This summer, one of the children brought a picture of the flower that they planted -- I couldn't believe how large it had grown.

Trees
Read: A Tree is Nice by Udry and Grade Old Tree by Mary Newell DePalma
Craft: Tree
  • Need paint dabbers filled with green paint, tree trunk shape copied onto white copy paper and brown crayons.
  • Have children color tree trunk brown.
  • Using the paint dabber, create a tree filled with leaves.
Really......can this be more simple?

Sunday, March 7, 2010

March Ideas

Dr. Seuss
Read: Mr. Brown can Moo, Can You? and I am NOT Going to Get Up Today by Dr. Seuss
Craft: Noise Shakers
  • Need paper party cups, beans, markers, stickers and duct-tape.
  • Using ketchup cups, have child count out four scoops of beans and fill into one of their cups.
  • Instruct each child to raise their hand when this task is completed. Then travel to each child and tape their cups together (drinking end to drinking end).
  • Child can then decorate their cups with markers and stickers.
  • Then send them home to drive their parents bonkers!
Alphabet
Read: ABC Bunny - Gag (borrowed from Woodbury P.L.) Chicka Chicka Boom for Wednesday Session and Kipper's A to Z for Thursdays session.
Craft: Watercolor Letters from Preschool Daze
  • Need water color paints, painters blue-tape, craft paper/watercolor paper and foam paint brushes.
  • Prior to storytime, blue-tape the first letter of each child's name to watercolor paper.
  • Give each child a paint palette with various colors of paint. And have them apply to paper.
  • When they are done, remove the tape. Viola..... 
Preschool Daze
Children's had a blast and were amazed at the result. The older children's projects looked similar to the Preschool Daze image. The younger ones .... not so much. The colors were muddied. Next time, I will try to be more specific with using one color at a time and etc.....

Spring
Read; Rabbit's Good News by Bornstein and Wake Up Spring by Ernst
Craft: Flower
  • Need tissue paper in two colors, green craft paper -- cut into a leaf and stem, ketchup cups, white glue, pony beads and blue craft paper.
  • Prior to storytime, cut out tissue paper into flower shapes, cut green paper into leaves and stems, and squirt white glue into ketchup cups.
  • Have child glue onto blue craft paper, two tissue flowers, stem and leaves.
  • Then glue ketchup cup onto center (carpel?) of the flower.
  • Have child count out 10 pony beads and place inside the cup.
  • Have each child sign their names.....
Super fun and super easy. The children loved counting and picking the color of the beads for their flower.

Rabbits
Read: Where Did Bunny Go? by Nancy Tafuri and Quiet Bunny by McCue
Craft: Carrot collage from No Time for Flash Cards
  • Need: Orange and green craft paper, white paper cut into carrot shape.
  • Prior to storytime, rip up orange craft paper into squares (depending on age, children can rip paper up themselves) and cut green paper into leafy green.
  • Have children glue the paper onto the carrot shape and finish it off with the leafy greens.
  • Easy-peasy...
No Time for Flash Cards
Easter Eggs
Read: The Easter Egg by Jan Brett and The Story of the Easter Bunny Katherine Brown Tegen
Craft: Easter Egg Suncatchers
  • Need sticky-back paper cut into egg shape, glitter, sequins, ribbon and bits of this and that
  • Prior to storytime, tape a sticky-back egg onto craft table.
  • Child "decorates" their egg.
  • Instruct children to raise their hand when they are finished decorating and they may leave the craft table for free play.
  • As children play, adhere a second piece of sticky-back on the top of egg and and then trim around the egg shape. Punch a hole into the top and thread and knot a ribbon.
Really simple and the children love using sticky-back paper. I try to use it as much as I can.

Sunday, February 7, 2010

February Ideas

Penquins
Read: Three Cheers for Tacky by Lester and Your Personal Penquin boardbook by Boynton
Craft: Color and cut Penguin (really lame, because I was expecting we would cancel due to snow)
Wednesday's session canceled.

Valentine's Day
Read: Guess Who? boardbook by Schaffer and Woof: a Love Story by Weeks
Craft:
Both Wednesday and Thursday canceled due to snow.

Birds
Read: Wild Birds by Ryder and Birds by Henkes
Craft: Feather paintings
  • Need multiple colors of poster paint. Feathers.
  • Layout paper plates with various colors of poster paint. Have child use feathers as a paint brush.
Kids LOVED this craft and I am going to repeat it again next year. Wednesday's session had been canceled due to snow. UGH, snow.

Monday, January 4, 2010

January Drop-in Storytime Ideas

Every year we try something different with January. We follow the Region 12 delayed school scheduled. So, if school is delayed, we also start late and cancel storytime. This year we tried drop-in for January.....and attendance was very very small....

Winter
Read: Here Comes Jack Frost by Konora and Caps, Hats, Socks and Mittens by Borden
Craft: Q-tip snowflakes
  • Need Qtips/cottonswabs, white glue, wax paper and glitter.
  • Tape a piece of wax paper to craft table
  • Place a generous dollop of glue on middle of wax paper. Have child dip one end of 8 Qtips into glue, then  lay the opposite end into the glue.
  • Have child sprinkle some glitter onto the entire "snowflake" and let dry.
  • When dry, carefully loosen from wax paper....Viola you have a snowflake.


Bears
Read: Bear Snores On by Karma Wilson
Craft: Bear Cave

  • Cut-out of a cave and a bear, have child color bear and place inside the cave. Glue ... The end.
Song:
Here is a Cave (Author Unknown)
Here is a cave (Make a cave out of your fingers on one hand)
Inside is a bear. (Put your thumb into the cave)
Now he comes out
To get some fresh air. (Take thumb out)

He stays out all summer
In sunshine and heat.
He hunts in the forest
For berries to eat.

When Snow starts to fall
He hurries inside
His warm little cave
And there he will hide. (Put thumb back into the cave)

Snow covers the cave
Like a fluffy white rug.
Inside the bear sleeps
All cozy and snug. (Place your other hand over the cave)

National Hugging Day
Read: What Baby Wants by Root and Snuggle Puppy boardbook by Boynton
Craft: Hug card
  • Need two cut-out arms, square-cut colored craft paper and the poem (see below).
  • Have child arms, glue poem onto center of colored craft paper and then glue arms at either end of the square. When glue is dry, fold arms in.
Poem:
A hug delights and warms and charms,
it must be why we all have arms!
Hugs are great for fathers and mothers,
sweet for sisters and swell for brothers.
So, stretch those arms without delay and
give someone a HUG today!
Here is my hug for you!